I was extremely excited to go traveling for Christmas this year. My parents live 7 hours away so I figured I'd find treasures in their stores that I hadn't looked at 20 times like the stuff in the thrift stores up here. My first find was in my mom's kitchen. She had a small lava lamp sitting on a shelf collecting dust. I asked if it was broken and she said that it wasn't, she just didn't use it any longer. So I snagged that. I did have to buy a new bulb for it but it works perfectly and looks great after a little clean-up. I think it will be a curiosity piece. Instead of telling them how it works, I'll show them how to look it up in a book or more likely, online. The chances of me having a book about how lava lamps work sitting on the shelf is slim to none.
I was frustrated at the thrift stores we visited because everything on display was Christmas! And there's nothing wrong with that, but it wasn't what I was looking for. Hobby Lobby, arguably one of the coolest stores ever, had a lot of things that were very cool but were either breakable or too expensive. I did find 5 posters in their clearance section I couldn't leave without:
1. The Presidents of America - current, all portraits in sepia
2. The Human Body - like what you'd see in a doctor's office
3. The Periodic Table - with actual pictures of each mineral, and if the mineral couldn't be photographed, the person who discovered it.
4. Neil Armstrong taking the first steps on the moon
5. Shark species - in proportioned size
And my final treasure is one I'm extremely excited about. It's a model of the human heart I found at a thrift store for $1.50. The pieces are still attached to the little pegs, so it's never been put together. It's dated 1973, that makes it 40 years old! I was slightly disappointed to see that I have to take the time to paint it and then glue it, but it will be worth it when complete. It can even be taken apart to show how different parts of the heart work. I think I might invest in a glass dome to display it in so it doesn't get dusty.
My other big treasure from the trip is actually an idea. Remember the oak card cases I wanted to turn into an I Spy Dewey Decimal Display? Well, I realized on the trip that I was biting off more than I could chew. Some of the sections of Dewey are too hard to represent with objects and if I collect them here and there for 5 years I still might not have enough to create the display.
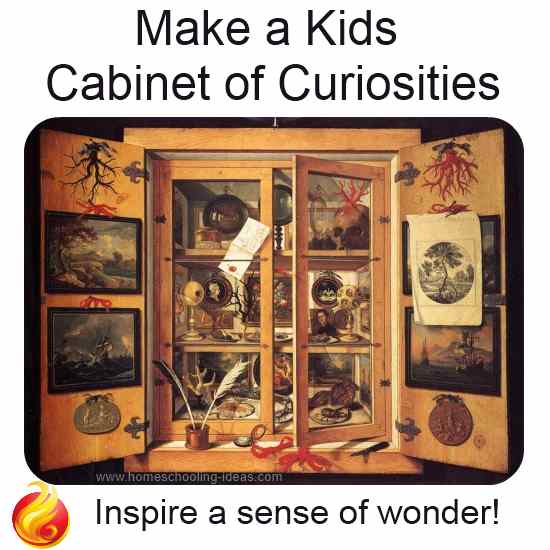
I recently read "Wonderstruck" by Brian Selznick and I was enthralled with the idea of the Cabinet of Wonders. What if I used those cases to create my own cabinet? They lock and have clear lids, they would only need a few tweaks to make them work. Now the part I hate. I am not supposed to use power tools (my husband fears for my life) and so I am reliant on him and my father-in-law to rework the cases so I can use them. I'd like cubbies built in so that when the cases are displayed upright each object has it's own little area. I want a mix of sizes too - in case some objects are larger than others. Since I have limited control over the exact construction of the cases, I am starting to think about what kind of wonders I want to put into it. So far I have:
1. a small wasp's nest that has been in the freezer for 6 months, just in case
2. 2 or 3 pieces from my fossil collection
3. seashells
4. this very weird lizard-foot-thingy
Someone left it at the public library and the other librarian on duty said it was too creepy to keep in the lost and found drawer, so I brought it home. I think it's real. The scales on the palm side of the foot are too detailed to be anything but. It's the kind of thing to really get little boys asking questions.
I am bursting at the seams wanting to go out hiking this spring and summer. I'd like to find some bones or feathers or even lake glass to display. Who knows what I will find. My mother-in-law mentioned she has a screech owl in her yard. I wonder if I can find any owl pellets?
-owl pellets
-bones of small animals
-turtle shell
-arrowheads
-snake skins
I am sure I'll come up with more ideas of things to look for. And maybe once I have the case up, people will donate items to the display. Those are ideas for "natural" display items but I could have any number of items in the display. I even have my dad's old slide rule, it would require a taller cubbie, but it's something most kids wouldn't be able to identify without help. It would be cool to learn to use so I could teach the kids.
Showing posts with label Displays. Show all posts
Sunday, December 29, 2013
Time keeps on slippin', slippin', slippin' into the future....
Wow, it's hard to keep up with everything. The holidays have made things extra busy around here, but I have accomplished some major goals:
The new shelves are in!
First we had to move a few sections at a time. Thankfully 4 sections were light enough to move with the books on them. The big section, under the bulletin board, was too heavy to move without taking the books off of it.
One thing I noticed while we were in the transition phase was that I liked the "pony wall" effect of the shelves in front of the couch area. The only problem was I couldn't see through them to know if they kids were putting their feet on the coffee table or what books were in their hands.
After we got all the blue shelving moved, I donated 2 of the shelf sections to teachers who needed them. One became my new periodical shelf, and one was relocated to a spot by my desk and houses the alphabet books and I Spy books. I've moved a good chunk of the books from nonfiction that are below a 2.5 level. Some aren't AR and we had to guess, but my volunteers and I are doing pretty well with it. There are more than I anticipated and that is one of the reasons we moved the alphabet books and I Spy onto another shelf. We just don't have room. Now the books are arranged much more closely to Dewey Decimal. Things don't always stay perfect and we don't sort the animal books exactly - bugs and spiders are together, fish, birds, and mammals have their own little sections.
The maintenance man wanted to demolish the largest section of shelves, but I had other ideas. It is the perfect size to act as my pony wall and only need a few repairs. I was surprised when it was brought back to me, freshly painted! It is now my display wall, where I will display any odds and ends that might inspire the kids to ask "where, what, why, how & who?" This is a slow process of course, since there isn't a "inspiring curiosity" line in the school budget.
Visually the design of the shelf is very appealing and I love how it looks. It gives a nice pop of bright blue (our school's main color). Right now it has our globe on it. I am hoping to add more globes from different time frames to the display. Globes out date quickly because of the political changes in our world, but why not have them from different times in history so kids can see the difference? The topographical globe I already have - it has raised mountain ranges - is old enough to still say U.S.S.R. A more current one would make it easier to show the kids how the political map changes while the physical continents remain static.
The other addition to the shelf was this little guy. Isn't he awesome! He's actually from Disney World's Animal Kingdom Dinoland. I would guess that a toy this big (the size of my cat) cost at least $30 in the theme park. His legs can be posed and he has the coolest texture on his skin. I found him at a thrift store for $2.50. His horn was bent so I doctored it up and his frill was ripping away from his shoulder, so that got fixed too. The kids can't get enough of him. I have a student with cerebral palsy in one of the kindergarten classes. He loves one on one interaction and textures. I asked him, "Have you ever wanted to hold a dinosaur on your lap?" I sat the dinosaur on his lap and his eyes got so big! Then I placed his hand on the dinosaur's lap and he giggled. I am so excited that he responded so well. Even our principal can't resist reaching out and petting the dinosaur as she goes through the library.
Many of the kids have asked what kind of dinosaur he is, and I have had a few kindergarten paleontologists tell me that he is a triceratops, but he isn't. I did some research into what dinosaurs are featured in the theme park ride and the only one that fits him is the Styracosaurus. Here is the wikipedia link on this type of dinosaur. (Yes, I know wiki isn't the greatest source but I can't link into our school's online encyclopedia.) I was thinking it would be a lot of fun to have a contest where the kids fill out slips with their guesses as to what kind of dinosaur he is. After a certain time frame I would take all the correct guesses and draw randomly for them for a winner. I have a cute dinosaur board book that would win for the K, 1 & 2 winner but I'd have to find something for the 3 & 4 and 5 & 6 winners.
Another great idea that my nieces shared with me is that at their school, each month you get to enter your name in for a drawing for a book. If you check out 2 books you get 2 slips for the drawing box. My niece won a copy of Rick Riordan's "House of Hades" last month. I went through my books and I have some I could use for prizes, but probably not enough to do monthly drawings. I think it would be okay to do a drawing at Christmas time and a drawing at the end of school in the spring. If we have a summer program it would be a nice incentive for that too. I will have to do more thinking on it.
I also went ahead and made a wreath for a fun "Charlotte's Web" display. The first grade classes read it each year, so it's a school favorite.
The spider web is made of kite string and I used a heavier string to add the letters for "Some Pig". I added the raffia to look like hay, the story takes place in a barn after all. The kids sometimes don't see it right away. Then they ask, "What's that supposed to be?" I added Wilbur (using a great drawing I found online) and that helps some. The last step will be to make Charlotte herself. She needs to be soft and gray. I bought some little poof balls to make her and our cat stole them. So she's not there yet, but she will be.
One last thing to share. The teachers had an after school get together and made crayon wreathes. Mine was the last completed but I love how it turned out.
The new shelves are in!
First we had to move a few sections at a time. Thankfully 4 sections were light enough to move with the books on them. The big section, under the bulletin board, was too heavy to move without taking the books off of it.
One thing I noticed while we were in the transition phase was that I liked the "pony wall" effect of the shelves in front of the couch area. The only problem was I couldn't see through them to know if they kids were putting their feet on the coffee table or what books were in their hands.
After we got all the blue shelving moved, I donated 2 of the shelf sections to teachers who needed them. One became my new periodical shelf, and one was relocated to a spot by my desk and houses the alphabet books and I Spy books. I've moved a good chunk of the books from nonfiction that are below a 2.5 level. Some aren't AR and we had to guess, but my volunteers and I are doing pretty well with it. There are more than I anticipated and that is one of the reasons we moved the alphabet books and I Spy onto another shelf. We just don't have room. Now the books are arranged much more closely to Dewey Decimal. Things don't always stay perfect and we don't sort the animal books exactly - bugs and spiders are together, fish, birds, and mammals have their own little sections.
The maintenance man wanted to demolish the largest section of shelves, but I had other ideas. It is the perfect size to act as my pony wall and only need a few repairs. I was surprised when it was brought back to me, freshly painted! It is now my display wall, where I will display any odds and ends that might inspire the kids to ask "where, what, why, how & who?" This is a slow process of course, since there isn't a "inspiring curiosity" line in the school budget.
Visually the design of the shelf is very appealing and I love how it looks. It gives a nice pop of bright blue (our school's main color). Right now it has our globe on it. I am hoping to add more globes from different time frames to the display. Globes out date quickly because of the political changes in our world, but why not have them from different times in history so kids can see the difference? The topographical globe I already have - it has raised mountain ranges - is old enough to still say U.S.S.R. A more current one would make it easier to show the kids how the political map changes while the physical continents remain static.
The other addition to the shelf was this little guy. Isn't he awesome! He's actually from Disney World's Animal Kingdom Dinoland. I would guess that a toy this big (the size of my cat) cost at least $30 in the theme park. His legs can be posed and he has the coolest texture on his skin. I found him at a thrift store for $2.50. His horn was bent so I doctored it up and his frill was ripping away from his shoulder, so that got fixed too. The kids can't get enough of him. I have a student with cerebral palsy in one of the kindergarten classes. He loves one on one interaction and textures. I asked him, "Have you ever wanted to hold a dinosaur on your lap?" I sat the dinosaur on his lap and his eyes got so big! Then I placed his hand on the dinosaur's lap and he giggled. I am so excited that he responded so well. Even our principal can't resist reaching out and petting the dinosaur as she goes through the library.
Many of the kids have asked what kind of dinosaur he is, and I have had a few kindergarten paleontologists tell me that he is a triceratops, but he isn't. I did some research into what dinosaurs are featured in the theme park ride and the only one that fits him is the Styracosaurus. Here is the wikipedia link on this type of dinosaur. (Yes, I know wiki isn't the greatest source but I can't link into our school's online encyclopedia.) I was thinking it would be a lot of fun to have a contest where the kids fill out slips with their guesses as to what kind of dinosaur he is. After a certain time frame I would take all the correct guesses and draw randomly for them for a winner. I have a cute dinosaur board book that would win for the K, 1 & 2 winner but I'd have to find something for the 3 & 4 and 5 & 6 winners.
Another great idea that my nieces shared with me is that at their school, each month you get to enter your name in for a drawing for a book. If you check out 2 books you get 2 slips for the drawing box. My niece won a copy of Rick Riordan's "House of Hades" last month. I went through my books and I have some I could use for prizes, but probably not enough to do monthly drawings. I think it would be okay to do a drawing at Christmas time and a drawing at the end of school in the spring. If we have a summer program it would be a nice incentive for that too. I will have to do more thinking on it.
I also went ahead and made a wreath for a fun "Charlotte's Web" display. The first grade classes read it each year, so it's a school favorite.
The spider web is made of kite string and I used a heavier string to add the letters for "Some Pig". I added the raffia to look like hay, the story takes place in a barn after all. The kids sometimes don't see it right away. Then they ask, "What's that supposed to be?" I added Wilbur (using a great drawing I found online) and that helps some. The last step will be to make Charlotte herself. She needs to be soft and gray. I bought some little poof balls to make her and our cat stole them. So she's not there yet, but she will be.
One last thing to share. The teachers had an after school get together and made crayon wreathes. Mine was the last completed but I love how it turned out.
Sunday, August 18, 2013
Finishing touches - school starts in t-minus 3 days!
So I'm finally feeling like I'm maybe ready to be a school librarian! I have 3 days left until school starts. In that time I need to create my class lists, finalize my schedule, do some cataloging and then shelf the books. I really think I have done a good job with the library.
I finished up early last week with the weeding. I wasn't able to clear quite enough room in Jr. Fiction to get all the books on their appointed shelves, but once check outs start, it should be okay. My solution was to pull large series from the shelves (waist high) and put them on top with book ends. This should increase the series' visibility and maybe up their circulation. I didn't have to weed much in the E Books, just shelf reading and shifting. I have seen signs that say "Easy Books" but they are more like the picture books that I would read to my kids, not necessarily easy. Also, I don't want to discourage older kids from choosing from that section if they just want to read for the fun of it, so I'm thinking about making a sign in the future that says, "E for Excellent Books".
I finished my bulletin board last Friday. I was inspired by this idea from Rachel Moani:
She didn't give a lot of details of how to make it, but I think I got it to work okay. I used a water heater box and used roll paper to cover the pieces. After I attached the book pages to the end pieces I glued down 1 sheet of white paper. Then I cut a second piece and only glued it at the spine. Then I was able to add my letters (love the die-cut machine at the school!) and art. As you can see, the book wouldn't actually go on my board. It's too big and heavy. My solution was to use book display stands to prop it up on the bookshelf directly below the bulletin board. Then I put up the pictures I colored of different types of adventure. To finish it off, I used the label making machine to create the story choices like the ones found in the Choose Your Own Adventure books. The finishing touch was to display some of our Choose Your Own Adventure books beside the board - how many kids have never even tried this type of book? I'm hoping to have a few try them and like them since I enjoyed them so much as a young reader.
I finally found Yoda! I had turned the house upside down on multiple occasions looking for him, but for some reason never looked in one particular frame. I thought there was no way he could be in it since it was bought specifically for a map of the cave system in Keystone, South Dakota. My husband convinced me to look and I found him!!! I went out today and bought him a new frame and he looks awesome! You'd never guess he's 30 years old. I would love to eventually find a copy of the ALA poster of the Muppets released around the same time.
This one is not cheap. I found some on eBay.com but I think I'll have to wait for them to become a little cheaper. I am hoping to purchase these two posters from the ALA Store with some of the money I make with this year's book fair:
And speaking of the Muppets (yeah, I know I'm a total nerd) I got super lucky yesterday. I decided to log in to Disney Movie Rewards and check for new rewards. I almost never have any luck. I always find something I want and don't have enough points, so I save up my points and then the item I wanted is out of stock....grrrr. But yesterday I logged in and found a 15" Kermit plush!
He's not the super high quality one I wanted, but he was free. If you don't do the Disney Movie Rewards program you are missing out! You don't even have to pay shipping.
With school starting so soon I had to go through the kids clothes and figure out what I needed to buy. I found my daughter's Mo Willem's Pigeon t-shirt. She doesn't wear it anymore and I could have put it into the box of t-shirts that will eventually become a t-shirt quilt, but then I decided to get some more use out of it. I didn't want to sew it into a pillow and I didn't want to have to buy a frame. So I came up with this:
I had the canvas on hand - I think I found it for a dollar at the thrift store and never found a use for it. Then I just pinned it into place with straight pins. I do wish it had been a smidge smaller canvas - in order to center the pigeon, I had to leave some of the neck line on the t-shirt visible. But the stuffed pigeon who lives at my school can perch up there and it will look great.
I have a new board on Pinterest too! It's a Library Wishlist. I mostly have artwork I'd like to work in at the library, but you never know what I'll pin to it in the future!
I finished up early last week with the weeding. I wasn't able to clear quite enough room in Jr. Fiction to get all the books on their appointed shelves, but once check outs start, it should be okay. My solution was to pull large series from the shelves (waist high) and put them on top with book ends. This should increase the series' visibility and maybe up their circulation. I didn't have to weed much in the E Books, just shelf reading and shifting. I have seen signs that say "Easy Books" but they are more like the picture books that I would read to my kids, not necessarily easy. Also, I don't want to discourage older kids from choosing from that section if they just want to read for the fun of it, so I'm thinking about making a sign in the future that says, "E for Excellent Books".
I finished my bulletin board last Friday. I was inspired by this idea from Rachel Moani:
She didn't give a lot of details of how to make it, but I think I got it to work okay. I used a water heater box and used roll paper to cover the pieces. After I attached the book pages to the end pieces I glued down 1 sheet of white paper. Then I cut a second piece and only glued it at the spine. Then I was able to add my letters (love the die-cut machine at the school!) and art. As you can see, the book wouldn't actually go on my board. It's too big and heavy. My solution was to use book display stands to prop it up on the bookshelf directly below the bulletin board. Then I put up the pictures I colored of different types of adventure. To finish it off, I used the label making machine to create the story choices like the ones found in the Choose Your Own Adventure books. The finishing touch was to display some of our Choose Your Own Adventure books beside the board - how many kids have never even tried this type of book? I'm hoping to have a few try them and like them since I enjoyed them so much as a young reader.
I finally found Yoda! I had turned the house upside down on multiple occasions looking for him, but for some reason never looked in one particular frame. I thought there was no way he could be in it since it was bought specifically for a map of the cave system in Keystone, South Dakota. My husband convinced me to look and I found him!!! I went out today and bought him a new frame and he looks awesome! You'd never guess he's 30 years old. I would love to eventually find a copy of the ALA poster of the Muppets released around the same time.
This one is not cheap. I found some on eBay.com but I think I'll have to wait for them to become a little cheaper. I am hoping to purchase these two posters from the ALA Store with some of the money I make with this year's book fair:
And speaking of the Muppets (yeah, I know I'm a total nerd) I got super lucky yesterday. I decided to log in to Disney Movie Rewards and check for new rewards. I almost never have any luck. I always find something I want and don't have enough points, so I save up my points and then the item I wanted is out of stock....grrrr. But yesterday I logged in and found a 15" Kermit plush!
He's not the super high quality one I wanted, but he was free. If you don't do the Disney Movie Rewards program you are missing out! You don't even have to pay shipping.
With school starting so soon I had to go through the kids clothes and figure out what I needed to buy. I found my daughter's Mo Willem's Pigeon t-shirt. She doesn't wear it anymore and I could have put it into the box of t-shirts that will eventually become a t-shirt quilt, but then I decided to get some more use out of it. I didn't want to sew it into a pillow and I didn't want to have to buy a frame. So I came up with this:
I had the canvas on hand - I think I found it for a dollar at the thrift store and never found a use for it. Then I just pinned it into place with straight pins. I do wish it had been a smidge smaller canvas - in order to center the pigeon, I had to leave some of the neck line on the t-shirt visible. But the stuffed pigeon who lives at my school can perch up there and it will look great.
I have a new board on Pinterest too! It's a Library Wishlist. I mostly have artwork I'd like to work in at the library, but you never know what I'll pin to it in the future!
Monday, August 5, 2013
Giant solar system mobile
I have found from my shelf reading that the kids love the 520s - a.k.a. books on the solar system and space. So I decided it would be fun to add a decorative display of the planets for my students. But never fear, I'm not going to take anything away from their science teachers - mine won't be proportionally correct. I found a very cool website called Planet Size Comparison where you can see how big the planets are in comparison to each other. For example, Earth and Venus both rank right at size 1 but Jupiter is an 11 and Mercury is 2.5 times smaller than Earth. Oh and the sun is 108 times larger than the Earth. So you see what I mean when I say I have a proportion problem.
Anyway, when I was having my brainstorm, I remembered seeing this cute project all over the Internet:
This is the best idea for the planets I can think of. I'll use different sized balloons to make the planets, along with yarn in colors that represent each planet. This is basically just taking the yarn, dipping it in watered down glue, and wrapping it around and around the balloon. Then a second coating of glue can be brushed on. Once it's all dry, you pop the balloon, pull it out the area you left open, and viola! If you really want to see how to do this project, visit this great tutorial by Raechel Myers.
My planets won't be light fixtures, they'll just hang from the cross beams of the skylight. I plan to stagger them out from the Sun, not necessarily in a straight line, but in different orbits.
Sunday, July 14, 2013
Teaching how to use the Internet responsibly & I Spy Dewey Decimal display
I have said it so many times, I'm not a teacher. So, there are some things I know are important but don't really know how to teach. I've been working my way through books on Library Skills & Manners, and I found one by Toni Buzzeo (she's a lot of great ones on this subject) called But I Read It On the Internet. It had a great worksheet in it to help kids figure out if the site they are using is a reliable source of information. I used that worksheet to create my own, and I plan to use it to help the 3rd grade and up classes learn to use the Internet responsibly. You can download my version of the worksheet here.
I really loved all of the books by Toni Buzzeo. In her book, The Great Dewey Hunt, she had the kids find small objects to represent the different classes of the Dewey Decimal system. I have been trying to decide the best way to make the DD system seem easy to understand to the kids. I was tossing around the idea of some kind of 3d collage for each DD class. I thought of maybe mounting them on half sphere's of Styrofoam and mounting them on the wall, but then I worried about the little objects being pried off. So my thinking switched to shadow boxes. This would be great, but my budget doesn't allow me to go buy 10 shadow boxes. But then it occurred to me out of the blue, I might have the perfect thing already in my possession!
These are card cases that my father-in-law built for my husband and his brother's collections. My husband still uses his, but my brother-in-law didn't want his, so we took them. They've been in my storage room for quite awhile. They are very solidly built, have plexi-glass lids, lock and can be tilted up or lie flat. Oh, and they are lined with dark blue felt, perfect for the blue and white Lincoln Leopards! I wish they had 5 sections each, since there are 10 DD classes, but I think I can get around that. Rather than have my husband remove the little ledges inside and put in 5 sections, I think I'll combine some of the classes that are going to be hard to display anyway. For example, the 000s General Knowledge, the 100s Philosophy and the 200s Religion. Each DD class will have a simple breakdown of what's in that range, then the objects will signify everything you can find in the class. Ideally, each section will look like it's own little I Spy scene.
Part of the work finding the object was to find a decent listing of the different classes and ranges of the Dewey Decimal System. So I created an abbreviate Dewey Decimal Classifications list that I think is kid friendly. Obviously there is more to each class, but I doubt kids would have much use for Freudian theory and frankly, I don't want to go too deeply into Religion in a school library.
I have always been a collector of - for lack of a better word - little things. I kept a "thing box" all through elementary and junior high and in high school I created a 3D collage with my things. I started treasure boxes for both of my girls and I keep odds and ends for scrapbooking and other projects. We have so far gathered a lot of little plastic animals - cheap ones from the dollar store, not our nice Schleich toys, plastic bugs, plastic dinosaurs, seashells, coral, a wooden spoon, art supplies, a baseball bouncy-ball, a mini football player, sports cards, old 45 records, dice & dominoes, playing cards, a globe (it's really a pencil sharpener), an American Flag and a 1776 keychain. I will need to keep my eyes open for other pieces that will fit into the cases; they are not deep so there is a limit on how big items can be. I am not sure how I'll represent the 800s, but I will cross that bridge when I get to it.
I really loved all of the books by Toni Buzzeo. In her book, The Great Dewey Hunt, she had the kids find small objects to represent the different classes of the Dewey Decimal system. I have been trying to decide the best way to make the DD system seem easy to understand to the kids. I was tossing around the idea of some kind of 3d collage for each DD class. I thought of maybe mounting them on half sphere's of Styrofoam and mounting them on the wall, but then I worried about the little objects being pried off. So my thinking switched to shadow boxes. This would be great, but my budget doesn't allow me to go buy 10 shadow boxes. But then it occurred to me out of the blue, I might have the perfect thing already in my possession!
These are card cases that my father-in-law built for my husband and his brother's collections. My husband still uses his, but my brother-in-law didn't want his, so we took them. They've been in my storage room for quite awhile. They are very solidly built, have plexi-glass lids, lock and can be tilted up or lie flat. Oh, and they are lined with dark blue felt, perfect for the blue and white Lincoln Leopards! I wish they had 5 sections each, since there are 10 DD classes, but I think I can get around that. Rather than have my husband remove the little ledges inside and put in 5 sections, I think I'll combine some of the classes that are going to be hard to display anyway. For example, the 000s General Knowledge, the 100s Philosophy and the 200s Religion. Each DD class will have a simple breakdown of what's in that range, then the objects will signify everything you can find in the class. Ideally, each section will look like it's own little I Spy scene.
Part of the work finding the object was to find a decent listing of the different classes and ranges of the Dewey Decimal System. So I created an abbreviate Dewey Decimal Classifications list that I think is kid friendly. Obviously there is more to each class, but I doubt kids would have much use for Freudian theory and frankly, I don't want to go too deeply into Religion in a school library.
I have always been a collector of - for lack of a better word - little things. I kept a "thing box" all through elementary and junior high and in high school I created a 3D collage with my things. I started treasure boxes for both of my girls and I keep odds and ends for scrapbooking and other projects. We have so far gathered a lot of little plastic animals - cheap ones from the dollar store, not our nice Schleich toys, plastic bugs, plastic dinosaurs, seashells, coral, a wooden spoon, art supplies, a baseball bouncy-ball, a mini football player, sports cards, old 45 records, dice & dominoes, playing cards, a globe (it's really a pencil sharpener), an American Flag and a 1776 keychain. I will need to keep my eyes open for other pieces that will fit into the cases; they are not deep so there is a limit on how big items can be. I am not sure how I'll represent the 800s, but I will cross that bridge when I get to it.
Monday, June 24, 2013
Faux Gumball Machine! Reading Challenges & Ideas
I have once again been inspired! Check out this cute idea:
This is adorable, but looking online I found that Gumball Machines aren't cheap! So today, being my day off, I dragged my girls to the thrift shop and found this plastic container thingy. Yes, the technical word is thingy. It was $0.50. I figured, add a little paint and viola!
I painted the inside of the lid and pedestal. I knew acrylic paint wouldn't be super durable with kids, so I worked in layers to get the look I wanted. I started with the gold paint, since I was painting from the inside out. You want the first thing you paint to be the first thing you see (kind of the opposite of painting on the outside.) The plastic doesn't absorb the moisture from the paint so you have to let it dry completely between coats, otherwise the almost dry paint sticks to the wet paint brush and comes off the plastic. Use very thin coats! I found they dry quickly and there is less chance of the colors mixing and causing you to need to start from scratch (I did twice.)
I found the little plastic containers (called Toy Vending Capsules) on Amazon.com but I am sure you can get them on eBay or other sites, I think the 250 count on Amazon would work for me, as opposed to the 1000 count. My other thought on this was to make lucky stars (origami). The silly poem, joke, quote, picture sentence or book suggestion could be printed on a strip of paper and then folded into a star. Easy-peasy and cheap! Here are some visual instructions. I did some checking online and I found that start with a strip of paper 30cm, or 1 foot long, and about 1cm wide, or about half an inch. I found that makes a very small star. So I might adjust the width.
My daughter informs me that the stars are hard to unravel without tearing them, and she is almost 9 so I imagine younger hands would find it even harder. I guess I'll go with the toy capsules. I've been working on a list of reading challenges, here's what I have so far:
This is adorable, but looking online I found that Gumball Machines aren't cheap! So today, being my day off, I dragged my girls to the thrift shop and found this plastic container thingy. Yes, the technical word is thingy. It was $0.50. I figured, add a little paint and viola!
I painted the inside of the lid and pedestal. I knew acrylic paint wouldn't be super durable with kids, so I worked in layers to get the look I wanted. I started with the gold paint, since I was painting from the inside out. You want the first thing you paint to be the first thing you see (kind of the opposite of painting on the outside.) The plastic doesn't absorb the moisture from the paint so you have to let it dry completely between coats, otherwise the almost dry paint sticks to the wet paint brush and comes off the plastic. Use very thin coats! I found they dry quickly and there is less chance of the colors mixing and causing you to need to start from scratch (I did twice.)
I found the little plastic containers (called Toy Vending Capsules) on Amazon.com but I am sure you can get them on eBay or other sites, I think the 250 count on Amazon would work for me, as opposed to the 1000 count. My other thought on this was to make lucky stars (origami). The silly poem, joke, quote, picture sentence or book suggestion could be printed on a strip of paper and then folded into a star. Easy-peasy and cheap! Here are some visual instructions. I did some checking online and I found that start with a strip of paper 30cm, or 1 foot long, and about 1cm wide, or about half an inch. I found that makes a very small star. So I might adjust the width.
My daughter informs me that the stars are hard to unravel without tearing them, and she is almost 9 so I imagine younger hands would find it even harder. I guess I'll go with the toy capsules. I've been working on a list of reading challenges, here's what I have so far:
- Read a book where you share either your first or last name with the main character.
- What’s the longest book you’ve ever read? Read one 25-50 pages longer.
- Read a book written about the years when your parents were your age.
- Read a book written about the years when your grandparents were your age.
- Read a book that rhymes (poetry!)
- Do you have a pet dog? Read about a cat. Do you have a pet cat? Read about a dog.
- Read about a country that starts with the same letter as your last initial.
- Read about a country that starts with the same letter as your first initial.
- Choose a book by the cover only.
- Read a book that takes place in South Dakota.
- Re-read one of your favorite books.
- Read a mystery that has “The Secret of the....” in the title.
- Read a mystery that has “The Mystery of the....” in the title.
- Read a Newberry Award winning book.
- Read a book where you share either your first or last name with the author.
- Read a book recommended by your teacher or Mrs. O.
- Read a book about a place you have never visited.
- Read a book about a place you have visited.
- Read a book where the main character is not a person, dog or cat.
- Read a graphic novel.
- Read a book that has a dragon in it.
- Read a book that your best friend recommends.
- Read a book about someone who is being bullied.
- Read a book written at least 50 years before you were born.
- Read a book with the word “Never” in the title.
- Read a book from the 000s in the Nonfiction.
- Read a book from the 100s in the Nonfiction.
- Read a book from the 200s in the Nonfiction.
- Read a book from the 300s in the Nonfiction.
- Read a book from the 400s in the Nonfiction.
- Read a book from the 500s in the Nonfiction.
- Read a book from the 600s in the Nonfiction.
- Read a book from the 700s in the Nonfiction.
- Read a book from the 800s in the Nonfiction.
- Read a book from the 900s in the Nonfiction.
- If you are a boy, read a book where the main character is a girl.
- If you are a girl, read a book where the main character is a boy.
Sunday, June 16, 2013
Fairy Tale Display Idea!
I went shopping the other day and bought myself a new pair of dress boots to replace a pair that I wore out last winter. What does this have to do with the library?? Well, I was lazing in bed this morning and thought of Puss in Boots - maybe I could put a toy cat into my old boots and display him? Then I thought, no, it would be funnier to have the boots on display with a little card that says, "Donated by Puss in Boots". And my next thought was of somehow displaying a pea with a "On Loan from the Royal Collection". Cheesy, but think of the fun I could have with it! A picnic basket could be on loan from Red Riding Hood. An old bucket and scrub brush from Cinderella. The possibilities are endless!
On one wall of my library is the "Special Collections" shelves. The top of them is where I am keeping the 5th & 6th grade level books right now. I think because the shelves are about chin height on me (I'm 5'3") they would be good for displays that I don't want handled. So where to go with the 5th & 6th grade books? There is a single book shelf on the far side of the library that right now contains a collection of South Dakota related titles. I think from the precise way it is arranged, they aren't circulating. So, I'm thinking I'll pull them from that shelf - but will scan them into my circulation program's list builder to make them easier to find next time I need SD titles - and use that shelf for the higher level books. I know younger kids read that high of levels, my own daughter is starting 4th grade next year and her reading level is 4.8-6.6 (fourth year, eighth month to sixth year, sixth month), so I want the books accessible but not necessarily in my main collection. As I've mentioned before, these books will eventually be moving to the new intermediate school.
I've been doing a lot of Internet searches and Pinterest searches to come up with display ideas. Here are some of my favorites.
I found the idea of color based displays at riskingfailure.blogspot.com . This post includes cute sayings for each color like, "It's Not Easy Being Green" and "Orange You Glad You Read Good Books?"
I love this FOUND flyer! I think hanging these flyers in a few places around the school would be a great tie-in with a dinosaur themed display. The display could include models, toys, stuffed animals, fossil collections and of course books.
These doors are designed for your garden, but how cute would these be tucked into corners or on the ends of shelves? Simple signs could have the names of your Shelf Elves who help you with keeping the library neat. I wonder what would be the best way to make these? I think my husband's wood working skills may be required.
I found this simple idea for Magnetic Poetry at riskingfailure.blogspot.com. I have a poetry set that we enjoyed for a few months at the public library (you'd be surprised what silly things "grown up" librarians can come up with). I would love to have a place in the school library where the kids could build little poems or funny sentences. I wonder if a small whiteboard would work. Then I could keep it at my desk and monitor it.
I have all of these ideas and more pinned on my Library Ideas board on Pinterest.
On one wall of my library is the "Special Collections" shelves. The top of them is where I am keeping the 5th & 6th grade level books right now. I think because the shelves are about chin height on me (I'm 5'3") they would be good for displays that I don't want handled. So where to go with the 5th & 6th grade books? There is a single book shelf on the far side of the library that right now contains a collection of South Dakota related titles. I think from the precise way it is arranged, they aren't circulating. So, I'm thinking I'll pull them from that shelf - but will scan them into my circulation program's list builder to make them easier to find next time I need SD titles - and use that shelf for the higher level books. I know younger kids read that high of levels, my own daughter is starting 4th grade next year and her reading level is 4.8-6.6 (fourth year, eighth month to sixth year, sixth month), so I want the books accessible but not necessarily in my main collection. As I've mentioned before, these books will eventually be moving to the new intermediate school.
I've been doing a lot of Internet searches and Pinterest searches to come up with display ideas. Here are some of my favorites.
I love this FOUND flyer! I think hanging these flyers in a few places around the school would be a great tie-in with a dinosaur themed display. The display could include models, toys, stuffed animals, fossil collections and of course books.
These doors are designed for your garden, but how cute would these be tucked into corners or on the ends of shelves? Simple signs could have the names of your Shelf Elves who help you with keeping the library neat. I wonder what would be the best way to make these? I think my husband's wood working skills may be required.
I found this simple idea for Magnetic Poetry at riskingfailure.blogspot.com. I have a poetry set that we enjoyed for a few months at the public library (you'd be surprised what silly things "grown up" librarians can come up with). I would love to have a place in the school library where the kids could build little poems or funny sentences. I wonder if a small whiteboard would work. Then I could keep it at my desk and monitor it.
I have all of these ideas and more pinned on my Library Ideas board on Pinterest.
Friday, June 14, 2013
Whimsey (continued)
Well, after letting everything dry, I found that the destination arrows curled. So, back to square one, but that is okay. For this round, I am going to start with black foam core. I was able to cut more arrows, since it was originally a trifold display. This time I have 11 arrows. I also used my husband's box cutter and got decently straight edges, so I am going to stick with the basic arrow shape.
My first step will be to sand all of the edges lightly to remove the scraggly paper on the cut lines. Then I am going to use a quality acrylic sealer on both sides of the arrows. I think it would be best to crackle just one side of the arrows (no base coat needed since they are starting out dark colored). I went to the store today and bought 2 colors of paint: pale yellow and pale blue. I didn't find a pale green I liked, or a bottle of white to mix my own. I don't know why the paint selection was so low!
I have an awesome friend with a cricut who is willing to let me cut out the names of my destinations. I think I'll cut them in different colors of cardstock and then use spray adhesive to attach them to their arrows. I have changed my list a little:
As I said above, I was disappointed in the paint selection at Wal-Mart today. I can make do with what I found, and I'm not complaining when the 2oz bottles are $0.57 each! I think I might go back and stock up. Knowing our Wal-Mart they are not going to carry them any more. I thought I had seen 8.5x10 bi-fold foam core presentation boards there, but when I looked today I couldn't find any. I was planning to use one like an swing-open frame to display my Book of the Month - I'd have had to cut an opening into one side to make a frame. But now that I think about it, a simple frame would work just as well. I will have to see what I can find at the thrift stores - I like the idea of an ornate style frame for my monthly display.
So, more on the destination arrows as I get them done. Wish me luck!
My first step will be to sand all of the edges lightly to remove the scraggly paper on the cut lines. Then I am going to use a quality acrylic sealer on both sides of the arrows. I think it would be best to crackle just one side of the arrows (no base coat needed since they are starting out dark colored). I went to the store today and bought 2 colors of paint: pale yellow and pale blue. I didn't find a pale green I liked, or a bottle of white to mix my own. I don't know why the paint selection was so low!
I have an awesome friend with a cricut who is willing to let me cut out the names of my destinations. I think I'll cut them in different colors of cardstock and then use spray adhesive to attach them to their arrows. I have changed my list a little:
- The Emerald City - with a little flying monkey
- Wonderland - with a little Cheshire Cat
- The Magic Treehouse
- Mr. Zucker's Farm - with a pig and a spiderweb?
- Neverland - with Tinkerbell
- Whoville
- Diagon Alley (instead of Hogwarts)
- Gotham City - with the Bat Symbol of course!
- The 100 Acre Wood (beware of Heffalumps & Woozles!)
- Terabithia
- Death Star - with an "Under Construction" logo
- The Spiderwick Estate
- Alagaƫsia (the land from the Inheritance Cycle by Christopher Paolini)
- Zorgamazoo
- Ink World (the land from Cornelia Funke's amazing books)
- Droon
- Middle Earth (the Shire, Mordor, Hobbiton)
- Atlantis
- Island of the Blue Dolphins
- Narnia
- The Emerald City (to the right) and Wicked Witch's Castle (to the right)
- Pixie Hollow (to the left) and Mermaid's Lagoon (to the right) - instead of Neverland
- Diagon Alley (to the left) and Azkaban (to the right)
- Gotham City (to the left) and Metropolis (to the right)
- The Shire (to the left) and Mordor (to the right)
- Pooh Corner (to the left) and Trespassers Will (to the right, you know, Piglet's house)
As I said above, I was disappointed in the paint selection at Wal-Mart today. I can make do with what I found, and I'm not complaining when the 2oz bottles are $0.57 each! I think I might go back and stock up. Knowing our Wal-Mart they are not going to carry them any more. I thought I had seen 8.5x10 bi-fold foam core presentation boards there, but when I looked today I couldn't find any. I was planning to use one like an swing-open frame to display my Book of the Month - I'd have had to cut an opening into one side to make a frame. But now that I think about it, a simple frame would work just as well. I will have to see what I can find at the thrift stores - I like the idea of an ornate style frame for my monthly display.
So, more on the destination arrows as I get them done. Wish me luck!
Friday, May 31, 2013
Still getting ready...
I've been working a little here and there to make a difference at the library. Most of the time I was at the school this week, I was working on getting books re-cataloged and re-labeled.
I'm still not sure what to do about the whole "special collections" section. I think the idea of the collection was sound when it was started, but it just isn't working for me. I have pulled small series (only 4 or 5 books) and re-cataloged and labeled them. I have been a librarian long enough that I don't believe in lumping things unnecessarily. My biggest project was the graphic novels that had been thrown together in the SC. I moved anything nonfiction back into nonfiction. If kids are looking for shark books, I want them to find them together in the nonfiction, even if one is a graphic novel-styled and another is made using photographs. I noticed a lot of graphic novels are being put in the 741.5 section of nonfiction, no matter what subject. So I changed them around, for example, putting the graphic novel classics (Swiss Family Robinson, Around the World in 80 Days, etc) under a single call number, "Graphic Classics."
I've also been mulling over the idea of what to do about stuffed animals. I get the idea of stuffed animals based on story book characters. I get the idea of stuffed versions of our school mascot, leopards. I don't get the idea of having a bunch of random, garage sale reject toys. Today when I was at the school, our principal pointed out the mountain of stuff in our resource room. She explained that I could take anything I wanted, and leave anything I didn't want from the library. The teachers take what they want and the leftovers are taken to other schools. Pretty cool idea, really. I ditched the last of the fake plants (dust catchers & spider web bases). I also took in 2 tubs of stuffed animals that have nothing to do with books. I still kept a small tub of beanie babies. I also found a bunch of puppets. I want to find a fun way to display them. What I don't understand was why the library had a bunch of random stuffed animals spread through it when I found, stuffed in a cupboard, a bunch of really nice Dr. Seuss character toys and almost all of the Laura Numeroff "If You Give a Mouse a Cookie" type toys. I also saved a couple of really nice monkey toys. I was thinking of using groupings of similar animals to create displays. The monkeys could be reading "Curious George", the bears reading "Wake Up Sleepy Bear", the giraffe's reading "A Giraffe and a Half" and the penguins reading "Tacky the Penguin". Something along those lines anyway. Eventually I want to have a huge leopard collection, we'll see how it goes.
I also wanted to note that I've started adding extra pages to the blog. I want to have one for each of the grade levels with ideas of read-aloud books for them.
Here are a few "before" pictures of my library. Check out that skylight! The collections are pretty evenly distributed with a work/computer area to my immediate left, nonfiction to my front left, the story area directly in front of my desk, fiction, jr fiction and special collections to my front right and easy readers to my immediate right.
I'm still not sure what to do about the whole "special collections" section. I think the idea of the collection was sound when it was started, but it just isn't working for me. I have pulled small series (only 4 or 5 books) and re-cataloged and labeled them. I have been a librarian long enough that I don't believe in lumping things unnecessarily. My biggest project was the graphic novels that had been thrown together in the SC. I moved anything nonfiction back into nonfiction. If kids are looking for shark books, I want them to find them together in the nonfiction, even if one is a graphic novel-styled and another is made using photographs. I noticed a lot of graphic novels are being put in the 741.5 section of nonfiction, no matter what subject. So I changed them around, for example, putting the graphic novel classics (Swiss Family Robinson, Around the World in 80 Days, etc) under a single call number, "Graphic Classics."
I've also been mulling over the idea of what to do about stuffed animals. I get the idea of stuffed animals based on story book characters. I get the idea of stuffed versions of our school mascot, leopards. I don't get the idea of having a bunch of random, garage sale reject toys. Today when I was at the school, our principal pointed out the mountain of stuff in our resource room. She explained that I could take anything I wanted, and leave anything I didn't want from the library. The teachers take what they want and the leftovers are taken to other schools. Pretty cool idea, really. I ditched the last of the fake plants (dust catchers & spider web bases). I also took in 2 tubs of stuffed animals that have nothing to do with books. I still kept a small tub of beanie babies. I also found a bunch of puppets. I want to find a fun way to display them. What I don't understand was why the library had a bunch of random stuffed animals spread through it when I found, stuffed in a cupboard, a bunch of really nice Dr. Seuss character toys and almost all of the Laura Numeroff "If You Give a Mouse a Cookie" type toys. I also saved a couple of really nice monkey toys. I was thinking of using groupings of similar animals to create displays. The monkeys could be reading "Curious George", the bears reading "Wake Up Sleepy Bear", the giraffe's reading "A Giraffe and a Half" and the penguins reading "Tacky the Penguin". Something along those lines anyway. Eventually I want to have a huge leopard collection, we'll see how it goes.
I also wanted to note that I've started adding extra pages to the blog. I want to have one for each of the grade levels with ideas of read-aloud books for them.
Here are a few "before" pictures of my library. Check out that skylight! The collections are pretty evenly distributed with a work/computer area to my immediate left, nonfiction to my front left, the story area directly in front of my desk, fiction, jr fiction and special collections to my front right and easy readers to my immediate right.
Subscribe to:
Posts (Atom)